Installing and configuring trail camera settings could sometimes be a daunting experience, given the plethora of options such as PIR sensitivity, motion filters, and resolution. They all have problems selecting the location, setting up the perfect scene, and adjusting the camera for sharp and reliable pictures.
This guide will dissect all the information one needs to acquire concerning trail camera installation and settings. Starting from the general overview of the device, the key features and functions, and finally, the detailed instructions for its setup.
We will also offer post-setup tips, the best brands, and some standard tricks enabling you to take great wildlife shots without much effort.
What Does a Trail Camera Do?
A trail camera or game camera is an outdoor, wireless hunting camera that is triggered automatically by the movement of animals in the vicinity. Here’s a simple breakdown.
Functions of a Trail Camera
- Motion Detection: Trail cameras are programmed to turn on if they sense movement to photograph these animals.
- Day and Night Monitoring: These either have infrared sensors or flash to take pictures during the day and at night.
- Weatherproof Design: Designed to be used under unpredictable conditions such as storms, rainfall, and snowy conditions.
Types of Trail Cameras
- Standard Trail Cameras: Low-end models that incorporate the usage of image and video capturing with motion sensitivity.
- Cellular Trail Cameras: Send pictures or videos using GPS technology to your mobile device or e-mail using the cellular network.
- Wi-Fi/Bluetooth Trail Cameras: Enable you to download photographs wirelessly from a smartphone or tablet, or take snapshots of what the camera sees within the vicinity through Wi-Fi or Bluetooth.
- Solar-Powered Trail Cameras: Equipped with solar panels to power the battery when necessary, perfect for use in the forests.
Key Features to Look For in Trail Cameras
- Image Quality: Look for higher megapixels for clear photos and HD video resolution.
- Trigger Speed: Determines how fast the camera takes a picture once motion is detected. Faster speeds capture animals in motion better.
- Detection Range: The distance at which the camera senses movement, usually ranging from 50 to 100 feet.
- Battery Life: Longer battery life or solar compatibility is essential for extended use in remote areas.
- Storage: Most use SD cards for storage, and larger capacity options can store more images and videos.
Popular Brands and Models
- Bushnell: Known for durable and weather-resistant models like the Bushnell Core DS.
- Browning: Models like the Browning Strike Force Pro X offer excellent image quality and fast trigger speeds.
- Spypoint: Specializes in cellular trail cameras, such as the Spypoint Link-Micro LTE.
- Moultrie: Offers user-friendly options like the Moultrie A-900i with decent quality and affordability.
- Stealth Cam: The Stealth Cam G42NG is popular for reliable performance and good night-vision clarity.
How To Set Up a Trail Camera?
Step 1: Choose the Best Location for Setup
The appropriate choice of location is crucial for capturing distinct images and videos of wildlife activity.
- Scout Animal Trails: Be on the lookout for signs of animals such as tracks or droppings or trails that are well tread on. Furthermore, concentrations of animals within watering spots, food source locations, and bedding places like thick growths also should not be left out.
- Consider Sunlight Direction: Get away from positioning the camera directly ahead of the sun as this often causes glare and shadow distortions in the photo. The North-facing arrangements are generally ideal to bring the uniformity of natural light in a single day.
- Determine Height and Angle: If it is for general wildlife surveillance, then fix the camera at a height of second to third point, that is, 2- 3 feet for medium to large-sized animals like the deer. Sink it lower to the ground for animals such as raccoons or squirrels if you have these around your compound. Rotate a little at the bottom to cover more space.
Step 2: Mount the Camera
When it comes to clear and steady images, the stability and method of attaching the instrument are highly important.
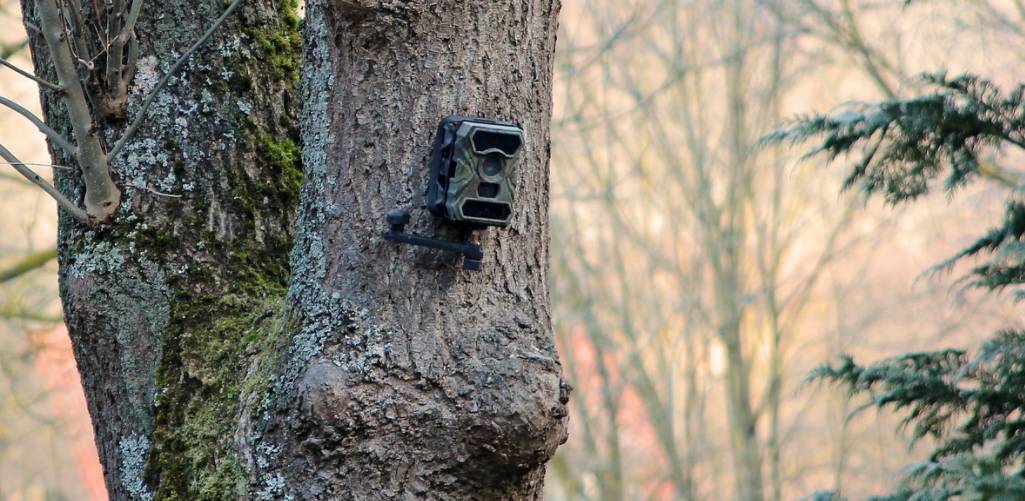
- Attach to a Tree or Post: Coil the mounting strap around a good tree if it is not possible then use a pole. Most of the Browning Trail Cameras include straps or brackets that can be adjusted so that fixing is simpler. Tighten the strap up, so that the camera does not move around due to the wind or because an animal brushed past it.
- Adjust the Angle: If the target area is just nearby, then tilt the camera down a little. If the target area is further down the trail, then keep the camera horizontal. One adjustment that is made aims at avoiding such situations by slightly tilting the camera so animals cannot move below or above the camera’s sight.
Step 3: Set Up Power and Storage
The power and storage settings are critical in favor of a stable and uninterrupted performance.
- Install Fresh Batteries: Most Browning cameras have an AA battery option; lithium tends to last longer, and perform better in cold plus hot temperatures than alkaline. Some models can be charged via an external battery or a solar panel in case the user is in need of an extended period of field time.
- Insert an SD Card: Place an SD card, preferably not more than 32 GB for Browning models, and format it before use. Large cards have the capability of storing more information as a result the camera can work for a longer time without being recovered.
Step 4: Configure Trail Camera Settings
Setting up the camera options correctly can make a big difference in performance.
- Power On the Camera: Go to the settings menu to set up preferences for the program to capture. Great news for every photography enthusiast – Browning cameras feature simple and intuitive menus for fast configuration.
- Select Capture Mode: Select between photo or video mode or switch between the two. Pictures are in comparison to videos more or less since they take less space and battery energy as compared to videos that can capture even detail and behavior. Hybrid mode as expected utilizes a combination of both, but this results in more battery loss.
- Adjust Trigger Speed and Sensitivity: In these modes, fast trigger speed is preferable, with values ranging from 0.2 to 0.5 seconds, for capturing active animals, sensitivity regulates the ability of the camera to detect motion. The higher sensitivity is appropriate for the vast areas to be covered, and the lower sensitivity is to minimize the alarms’ triggering in the thickets.
- Set Delay and Burst Mode: Interval settings define the period in which a certain action will be triggered (for instance 10 seconds or 1 minute). Burst mode takes several frames on a single trigger event and this is great if you need to catch an action that happens fast.
Step 5: Set Time, Date, and Other Preferences
Correct time and date settings make it easier to analyze patterns and behaviors.
- Set Date and Time: When setting the correct date and time, the movements of animals can be recorded accurately. Most trail cameras today, including those of Browning, come with simple features for inputting date and time.
- Add Other Preferences: These cameras have more features such as SNR data, temperature, or moon phase, which may help hunters or researchers. Boolean, if available, enables GPS location so that the user can easily find his/her location of interest.
Step 6: Test the Camera Position and Trigger
Testing the camera setup is crucial to avoid blank shots or missed activity.
- Walk-Test the Detection Zone: To check if detection exists in front of the camera and walk around within a range of its coverage. The camera should take images or videos with some visibility of the area of interest required to be monitored.
- Review Test Images: Look at the images or the videos to be certain that they get the right field of view and aren’t blind to some sections of the trail. In case the results are unsatisfactory, the camera positioning, elevation, or touch sensitivity should be changed.
Step 7: Finalize Setup and Minimize Scent
Minimizing human scent around the setup area can prevent animals from avoiding it.
- Turn the Camera to “ON” Mode: Once you’re happy with the test shots, turn the camera to “ON” or “ACTIVE” mode to start monitoring. Confirm that the camera settings and trigger mode are saved and active.
- Avoid Leaving a Scent: Wear gloves when handling the camera and minimize touching the surrounding area to avoid leaving human scent, which may deter some animals from approaching.
Step 8: Regularly Check and Maintain the Camera
Maintaining the trail camera ensures consistent functionality and battery life.
- Check Battery and SD Card: Every few weeks, especially in high-activity seasons, revisit the camera to replace batteries or SD cards if necessary. Browning models usually have battery and SD capacity indicators for easy monitoring.
- Download and Review Photos/Videos: Regularly review the stored images to analyze animal patterns, behavior, and frequency of visits.
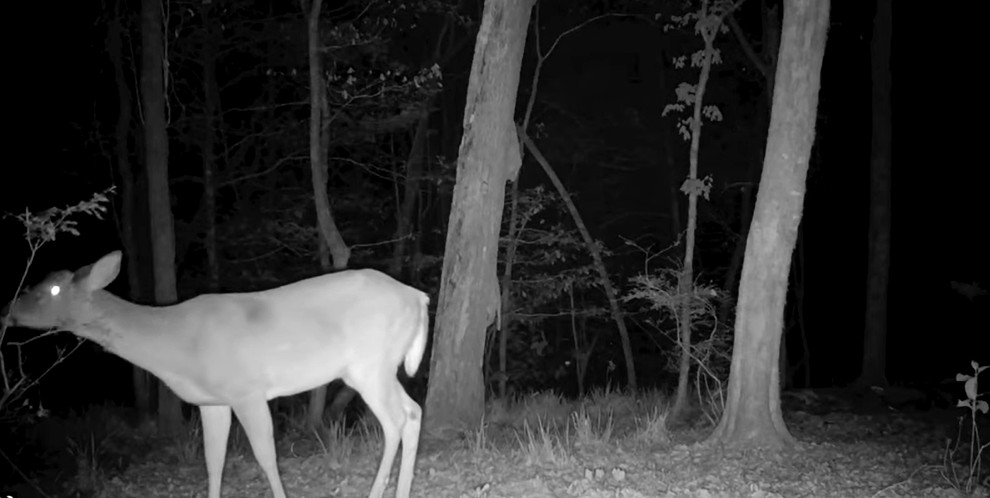
deer trail camera photo
Trail Camera Setting Tips
Adjusting the trail camera configuration allows for better picture and video shooting depending on the habitat.
All settings ranging from trigger speed, sensitivity, photo mode, and others, determine camera performance regarding specific environments, lighting, and cardinal behaviors of wildlife in the respective environment.
Below is a guide to assist you in achieving the best outcome.
How to optimize your trail camera settings?
- Adjust Trigger Speed for Animal Movement: Long-range trigger speeds, 0.2 to 0.5 sec are good for trails or large field movement of animals. Lower velocities can be applied in feeding or bedding zones where animals may remain static for some time.
- Use Burst Mode for High Activity Areas: Burst mode takes multiple photos with a single firing process; it works well where a lot of people move around. This provides an opportunity to cover different parts of an animal’s movement or group activity that might otherwise be unnoticed.
- Optimize Sensitivity to Minimize False Triggers: Greater sensitivity is better for targeting smaller animals or detecting movement from a distance but can trigger false alarms in windy conditions or thickets. Less sensitivity is more appropriate for controlled zones or feeding points to spend less power and store data.
Tips for different environment settings
1. Open Fields
- Trigger Speed: Use a fast trigger speed (0.2 seconds or less) to capture fast-moving animals crossing the open space.
- Detection Range: Set the detection range to the camera’s maximum for covering large, open areas.
- Sensitivity: High sensitivity to capture animals from a greater distance.
- Photo Mode: A single-photo mode is often sufficient in open spaces since the clear field of view reduces obstructions.
2. Dense Woods or Forests
- Trigger Speed: Use a moderate trigger speed (0.5-1 second) as animals in dense cover are likely moving more slowly.
- Sensitivity: Lower the sensitivity to avoid false triggers caused by branches, leaves, or other vegetation movement.
- Night Mode: Choose an infrared or no-glow setting for nighttime to avoid startling animals.
- Photo or Video Mode: If you want to observe behavior, consider short video clips. Otherwise, stick to burst photo mode to avoid excess storage use.
3. Trails and Game Paths
- Angle: Angle the camera down the path, rather than directly perpendicular to it, to capture animals as they approach and pass.
- Trigger Speed: Fast (0.2-0.5 seconds) to ensure you capture the animal as soon as it enters the frame.
- Burst Mode: Enable burst mode to get multiple shots per trigger, ensuring you capture the animal’s full movement.
- Time Lapse: Consider setting up a time-lapse if you want continuous monitoring at specific times of day (e.g., dawn or dusk).
4. Watering Holes or Feeding Areas
- Trigger Delay: Set a longer trigger delay (e.g., 1-5 minutes) to avoid filling your SD card with similar images of animals staying in one spot.
- Sensitivity: Set to medium to capture animals as they enter or exit the area without excessive triggering.
- Night Mode: Use infrared or low-glow mode for low light to avoid startling animals at the water’s edge.
- Video Mode: Video can capture interesting behaviors at watering holes but be mindful of battery and storage consumption.
How to use different settings effectively?
1. Photo vs. Video Mode
- Photos: Suitable for scouting purposes, especially if you want to maximize storage and battery life. Use single-photo or burst mode in high-traffic areas.
- Videos: Good for observing animal behaviors. Set short video lengths (10-20 seconds) to save battery and memory, particularly if activity frequency is high.
2. Day and Night Settings
- Daytime Settings: Use high-resolution settings if battery life and storage aren’t concerns, as daytime shots tend to be clearer and more detailed.
- Nighttime Settings: Use infrared for stealth and no-glow mode if you’re concerned about spooking animals. Reduce resolution at night if power conservation is important, as nighttime shots use more battery.
3. Temperature and Weather Adjustments
- Extreme Cold: Use lithium batteries, which handle cold weather better than alkaline ones. Reduce the resolution slightly if the temperature affects battery performance.
- Rainy/Windy Conditions: Lower sensitivity to avoid unnecessary triggers caused by wind or rain. Check waterproof seals and ensure the camera is mounted securely to avoid damage or shaking.
4. Time-Lapse Setting for Large Areas
- Time-Lapse for Field Coverage: Time-lapse mode is ideal for monitoring large fields or open areas with lower animal traffic. It captures images at set intervals, creating a record of activity throughout the day without relying on motion triggers.
Trail Camera Post-Setup Tips
After setting up your trail camera, following these steps ensures it operates effectively and captures high-quality footage:
1. Test the Camera
- Daytime Test: Check image/video quality, motion detection range, and trigger speed during daylight.
- Nighttime Test: Assess the camera’s infrared or flash functionality to confirm it captures clear images in low light.
- Trigger Test: Walk in front of the camera to ensure the sensor is working and aligned properly.
2. Camera Scent Elimination
- Use scent-eliminating sprays or wipes to reduce human odor on and around the camera.
- Wear gloves when handling the camera to minimize contamination.
- Avoid placing the camera near areas with strong human scents like trails or feeding stations you’ve recently handled.
3. Attract Wildlife Animals
- Food and Bait: Scatter corn, apples, or other wildlife-preferred food nearby. Ensure local regulations allow baiting.
- Scent Lures: Use deer attractants or other animal-specific scents to draw wildlife into the camera’s view.
- Natural Elements: Position the camera near water sources, game trails, or scrapes that animals naturally visit.
4. Know About Common Issues and Solutions
🚨 Issue 1: Overexposed/Underexposed Photos
- Adjust the camera angle to avoid direct sunlight or excessive shadowing.
- Use cameras with adaptive exposure settings for varying light conditions.
🚨 Issue 2: False Triggers
- Remove tall grass, branches, or other moving objects in the detection zone.
- Reposition the camera to avoid capturing unnecessary movements like blowing leaves.
🚨 Issue 3: Blurry Images
- Ensure the camera is mounted securely to avoid vibrations.
- Use cameras with faster trigger speeds for moving wildlife.
🚨 Issue 4: Low Battery Life
- Use lithium batteries for longer runtime.
- Adjust settings like video length or reduce photo resolution to conserve power.
🚨 Issue 5: Missed Activity
- Confirm the motion detection range is set appropriately.
- Angle the camera towards likely animal paths for better coverage.
FAQs About Trail Cameras
1. What is Trail Camera PIR Interval?
The PIR (Passive Infrared) interval is the delay between motion-triggered recordings. After detecting motion and capturing an image or video, the PIR interval prevents the camera from immediately retriggering, allowing a pause before it resumes detecting movement.
- Example: A 10-second PIR interval means the camera will wait 10 seconds after each activation before detecting a new motion.
- Purpose: Helps conserve battery life and avoid redundant captures.
2. What is PIR Sensitivity on a Trail Camera?
PIR sensitivity determines the camera’s ability to detect heat and motion. Higher sensitivity captures smaller movements or animals further away, while lower sensitivity reduces false triggers from wind, vegetation, or temperature fluctuations.
- High sensitivity: Suitable for cooler climates or areas with small animals.
- Low sensitivity: Best for warmer climates or windy locations to avoid false triggers.
3. What is the Fill Light Distance on a Trail Camera?
The fill light distance is the range at which the camera’s illumination (IR LEDs or flash) can effectively light the area for nighttime photos or videos.
- Standard range: 50-100 feet, depending on the camera model.
- Impact: Determines how far away animals can be and still appear lit in nighttime images.
4. What is a Motion Filter on a Trail Camera?
The motion filter helps the camera distinguish between genuine movement (e.g., animals) and non-relevant triggers (e.g., swaying branches or grass).
- Filters out minor motions caused by wind or debris.
- Reduces false triggers, saving memory and battery life.
5. What Are Trail Camera Sensitivity Settings?
- High sensitivity: Detects smaller and farther movements but may trigger more false alerts.
- Medium sensitivity: Balances detection range and accuracy. Ideal for general use.
- Low sensitivity: Best for areas with frequent environmental triggers, like strong winds or heavy foliage.
6. What is the Best Delay Setting for a Trail Camera?
The best delay setting depends on the location and purpose:
- 5-10 seconds: Active trails with frequent animal movement.
- 30 seconds to 1 minute: Feeding areas or less-trafficked locations.
- Longer delays (5-10 minutes): To avoid capturing the same animal repeatedly in low-traffic zones.
7. What is the Best Setting for a Trail Cam?
- Photo mode: Ideal for identifying specific animals.
- Video mode: Great for behavioral observation or capturing dynamic scenes.
- Hybrid mode: Captures both photos and video for a comprehensive record.
- Other: Set the camera height at 2-3 feet for deer or similar animals. Use time-lapse mode for large open fields to track movement over time.
8. What Resolution Should I Set My Trail Camera?
Match resolution to your memory card capacity and desired image quality.
- 5-8 MP: Suitable for basic wildlife monitoring with limited storage space.
- 10-12 MP: Balances image quality and storage usage.
- 16 MP and Above: Ideal for high-detail photos or enlargements, but consumes more storage and battery.
Conclusion
Trail camera settings entail choosing a location, and tuning and preserving the equipment to record the highest quality images and videos. Even with this, the following steps and tips will help you get the best from your trail camera as well as learn more about the behaviors of the animals you are tracking.
Whether hunting, conducting research, or just casual animal watching, properly positioning a trail camera can provide interesting peaks into this world.







Leave a reply