The worst nightmare of a hunter is losing a prized trophy to decay. Preserving a deer skull mount or elk skull mount is like a declaration of a successful hunt, but the work is strenuous.
Many hunters grapple with questions like: Is it legal for me to have a skull that’s been found in the woods? How do I clean and bleach it without ruining the antlers? How would I display it in the best way? And, most importantly, how can we keep that magnificent rack from deteriorating?
Read this guide, and the concerns about your trophy becoming a source of shame over time will be addressed.
Everything About Making a Deer Skull Mount
1. What do you call a deer head on the wall?
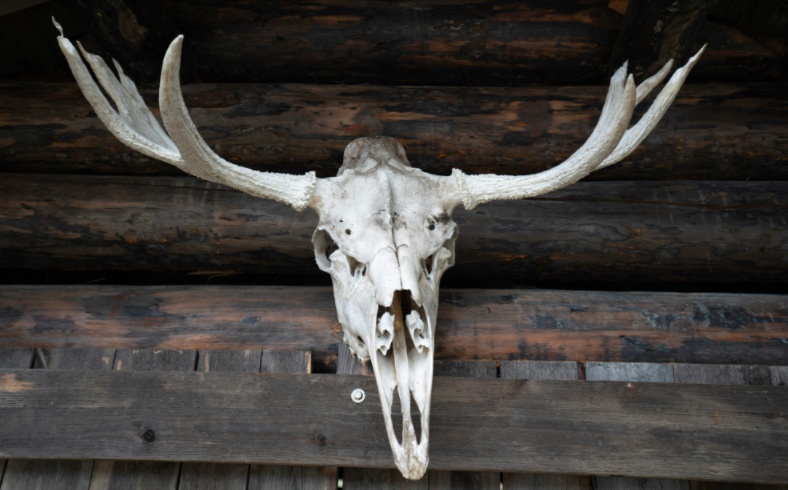
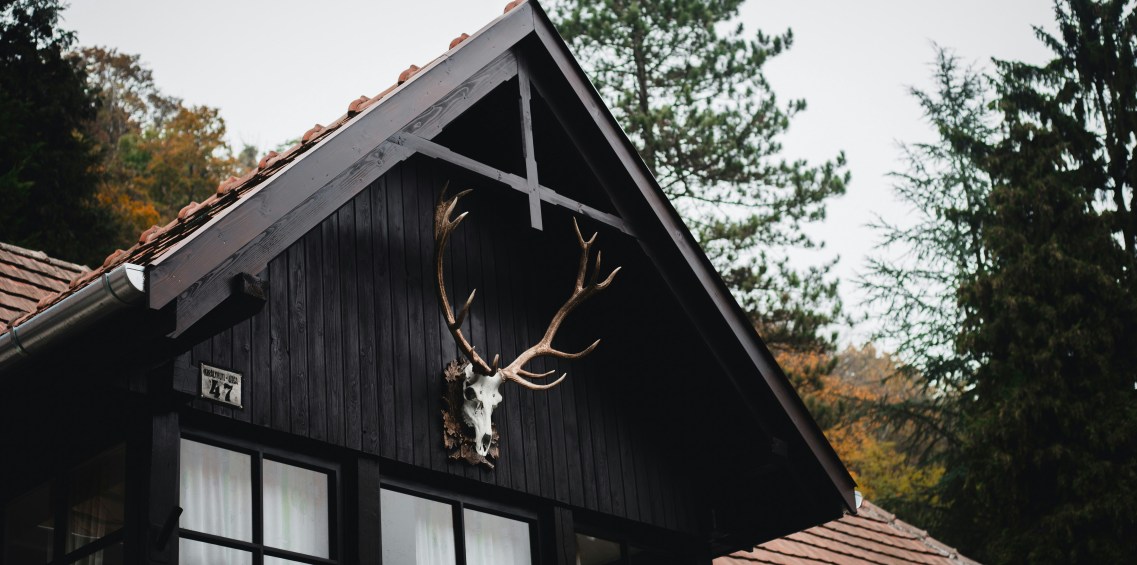
A deer head mounted on the wall is commonly called a taxidermy mount or deer mount. There are different types of mounts: when the entire skull is displayed, it’s often called a European mount, whereas mounts featuring a shoulder section are called shoulder mounts.
2. Why do hunters like to display taxidermy animals?
Hunters display taxidermy animals as a way to:
- Honor the animal, and celebrate a successful hunt.
- Save the memories of having experienced unique hunting experiences.
- Use the beauty of Wildlife and the Natural Artistry in Antlers or Skulls.
- Gives a rustic touch to the homes or cabins.
3. Can you own a deer skull with antlers found in the woods?
Local wildlife laws determine if you’re allowed to have a deer skull you find in the woods. As in most countries, some jurisdictions require permits to do this to prevent illegal harvesting of wildlife. Before removing a deer skull or antlers, check your local and state regulations.
4. How to preserve a deer skull and antlers for taxidermy
Preserving a deer skull and antlers for taxidermy involves several essential steps:
- Harvest the Skull: Start by cutting the neck from the head, be careful to remove the head, and leave enough neck so the head splits clean. Thus it provides a good working foundation for dealing with the skull.
- Remove Soft Tissue: Strip the skull as much flesh, brain matter, and skin as it can. Small tools and sharp knives can be of help when tight areas are to be reached. The first part of this cleaning helps to reduce the risk of bacteria growth and helps to expedite the preservation process.
- Degrease: Place the skull in a warm water solution of dish soap, for 24-48 hours. The finished clean, professional finish depends on removing the grease from the bone.
- Sanitize and Whiten: Sanitize and whiten the skull with a hydrogen peroxide solution. Household bleach is something to avoid as it weakens bone structure over time.
- Dry and Seal: Dry the skull completely away from draft, in a well-ventilated area. When dry (this takes a fairly long time), apply a clear lemon sealant or matte varnish to seal the skull and protect it from dust, moisture, and UV damage.
5. How to clean a deer skull for mounting?
Preparing to clean a deer skull for the mount is serious business, and only by treating each step with seriousness and attention to detail will you obtain a professional result. Follow these steps:
- Skin and Scrape
The first step is to cut all the skin, eyes, and soft tissue off of the skull using a sharp knife. This way, you will be thorough, which will reduce the whole cleaning time later. Hard-to-reach areas need to be worked on using small tools or tweezers.
- Boil the Skull
Put the skull (not the antlers) into a large pot of simmering water. Also, avoid boiling at high heat as it results in the weakening of the bone. Usually, you should cook for another 1 – 2 hours to soften up any remaining tissue.
- Scrub Off Residue
After you boil, scrub away residual tissue using a stiff brush. Mainly around crevices be patient and thorough.
- Degrease
Degrease the skull by soaking in a warm water, dish soap (like Dawn) degreasing solution for 24–48 hours. This step cleanses the oils that tend to get on the bone and color it over time.
- Sanitize and Whiten
To sanitize and whiten, submerge the skull in hydrogen peroxide (3%-12%). Bleach can damage the bone structure, so avoid it.
6. How do you bleach a deer skull and antlers?
Bleaching a deer skull is a vital step when trying to achieve a shining and clean mount. Here’s a detailed guide to ensure the best results:
- Prepare the Skull
Make sure the skull is degreased and clean before bleaching. The tissues, fat, and oils should be removed so you do not end up with uneven whitening. For the bleaching process to work well, the skull has to be fairly well-cleaned.
- Use Hydrogen Peroxide
Get a 3%–12% hydrogen peroxide solution, easily found in beauty supply stores and pharmacies. Do not use household bleach as it gets weaker and more damaged as time passes and will become brittle and discolored.
- Apply the Peroxide
Brush, spray bottle, or submerge in the solution to evenly coat the skull. Submerge only, and keep clear of the antlers or they will discolor. For hard-to-reach areas, wrap up cotton balls or towels soaked in peroxide.
- Allow Whitening to Occur
Place your skull in a well-ventilated area and leave it there for 24 — 48 hours. So use plastic wrap to cover the skull and soak it to keep the moisture to increase the bleaching process.
- Rinse and Dry
Rinse the skull with clean water until you can rinse it thoroughly. Dry it fully in a cool dry space away from the air. It can yellow over time so avoid direct sunlight.
- Optional Sealant
In order to keep it whitened, seal with matte or clear sealant. This helps protect against dust, moisture, and UV damage so the skull does not suffer damage.
7. Are deer antlers worth money?
Yes, deer antlers can be valuable depending on their size, condition, and rarity. They are used for:
- Decorative purposes(e.g., chandeliers, furniture).
- Crafting materials(e.g., knife handles, jewelry).
- Dog chews. Prices range from $10 to hundreds of dollars per antler.
8. How to remove velvet from a whitetail deer’s antlers?
If velvet is removed from the antlers, it can leave them polished and clean for mounting or display. Here’s a more detailed guide:
- Determine the State of the Velvet
You should first check to see whether or not the velvet is fresh or dried. Dry velvet is more difficult to remove and requires more tools than removed fresh velvet.
- Soak the Antlers
The velvet is dried, and then soaked in warm water for several hours to soften the tissue. Letting them soak helps to loosen the velvet and lets it break off more easily. Soak areas that are stubborn for overnight.
- Scrape Off the Velvet:
Scrape off the velvet, with a dull knife, rough cloth, or antler scraper, being careful to leave as little skin and fur as you can. Work slowly to not hurt the bone underneath. If you’re working with fresh velvet, you’ll find that it heats up quicker, but dried velvet may take a little extra effort.
- Use Fine-Grit Sandpaper:
Smooth your antlers with fine-grit sandpaper (220 – 320 grit) after you remove most of the velvet. Pat with a very light sand to clean and polish a natural surface, keeping the natural grooves and texture.
- Apply a Finish:
For a more natural beauty to the antlers, apply a light coat of linseed oil, and mineral oil to clear polyurethane. This will keep the antlers looking slightly more shiny and won’t dry out or crack during the drying times.
9. How to cut deer antlers off the skull?
Cutting deer antlers from the skull is a task that requires precision to preserve the integrity of the antlers. Follow these steps for the best results:
1. Mark the Cut
Find the union where the antlers meet the skull plate. Mark or pencil the outline of the cut. The idea is to leave the least amount of skull available whilst preserving the natural curvature of the antlers.
2. Choose the Right Tool
Cut with a hacksaw or reciprocating saw using a fine tooth blade. Controlled cutting reduces the risk of damage to antlers. If you’re adding precision, take a bone saw for larger skull plates.
3. Secure the Skull
Clamp down the skull if possible, or set it on a stable surface. It will prevent movement and will result in a clean straight cut.
4. Cut Carefully
Slowly cut through the skull plate where it follows your markings. When removing antler bases, take great care not to damage the base or surrounding material.
5. Smooth the Edge
After removing the antlers, use fine-grit sandpaper or a file to smooth the cut edges. This step ensures a clean finish and removes any jagged bone that could affect mounting or display.
10. How should you hang a deer mount?
The way you mount a deer mount matters — not only for safety but for aesthetics as well. Here’s how to do it effectively:
- Choose the Right Wall Anchor
Find a stud in the wall for the most secure results. If a stud isn’t there, use heavy-duty wall anchors rated for the weight of your mount. For lightweight mounts, anchors rated 50-75 lbs are the norm, with larger mounts needing 100 lbs or more.
- Install the Mounting Bracket
Mount attacher assembles the skull or plaque to the back with a sturdy metal mounting bracket. However, a skull mount bracket designed specifically for European mounts is recommended for European mounts. Make sure the bracket is well screwed in the mount.
- Position the Mount
Attach the mount to the wall and adjust it to the appropriate height and angle. For most displays, eye-level positioning works best.
- Hang and Level
Attach the bracket to the wall anchor and make sure the mount is flush with the wall. You can make fine adjustments with a spirit level. If you want even more stability, consider anchoring it to additional points to prevent tilting.
- Final Touches
View the mount from different angles to make sure it is all properly aligned and looks nice. Adjust as needed.
11. What equipment do you need to skin a deer?
- Sharp Skinning Knife: For precise cuts.
- Game Hoist: To elevate the deer for easier access.
- Cutting Board or Surface: To protect your tools and work area.
- Gloves: For hygiene and safety. It can protect you when processing the game.
- Bone Saw: For removing the skull or cutting through joints.
12. What are some ways to prevent deer antlers from chipping?
- Apply Protective Coating
If you don’t want your deer antlers to chip or want them to last longer, apply a clear polyurethane spray or wood sealant to protect the surface to prevent them from chipping.
- Handle Gently
Do not make impact drops since this could cause fractures of the antlers.
- Store Properly
Antlers can be stored at cool and dry locations without moisture and pests to prevent the structure from weakening. Spare them some additional protection in transport or long-term storage by employing padded or cushioned storage containers.
13. What are some popular deer skull mount ideas?
- European Mount on Wooden Plaque: Classic and timeless.
- Antlers Only: Cleanly cut and mounted on wood or metal.
- Rustic Style: Incorporating wood slabs, bark, or reclaimed materials.
- Painted Skull: Artistic designs like tribal patterns or metallic finishes.
- LED-Lit Display: Adding modern lighting elements.
14. How much to buy a deer skull mount?
The cost of a deer skull mount varies depending on size and craftsmanship.
- DIY Mount: $30-$50 (materials only).
- Professional European Mount: $100-$200.
- Custom Artistic Mount: $300 or more.
Check more on: How Much Does It Cost to Mount a Deer Head?
15. How to sterilize deer antlers for dog chews?
Sterilizing deer antlers for dog chews ensures they are safe and free of harmful bacteria. Follow these steps:
- Boil the Antlers: Put the antlers in boiling water for thirty to sixty minutes, or until they kill any bacteria and clean out any dirt or dirt. Don’t overboil as that weakens the antler.
- Scrub Thoroughly: Use a stiff brush to scrub the antlers removing all dirt, residue, and remaining tissue. Look carefully at crevices.
- Bake to Dry: Bake the antlers for an hour or so at 200°F and put them on a baking sheet. This process is undertaken so they are completely sanitized and helps harden the surface.
- Inspect for Safety: Sand them down if there are any sharp edges or splinters on the antlers. It prevents injuries to your dog’s gums or its teeth.
- Optional Coating: If desired, rinse the antlers with a food-grade antibacterial solution before giving them to your dog.
Conclusion
If you follow these instructions, you can feel safe saving your deer skull as a great trophy.
Also, remember to always stay safe and legal. You will end up with a mounted trophy or a timeless trophy display, regardless of the type of mount you choose, just as long as you take the time to mount your trophy correctly.
Celebrate the journey toward completing your hunt and handing your memories over to an enduring print.







Leave a reply