Choosing the right scope magnification can feel overwhelming. You see scopes advertised with numbers like “3-9x” or “4-16x,” but what do they mean? And how much magnification do you need for that perfect shot at 100 yards, 500 yards, or even 1000 yards?
This guide cuts through the confusion on scope magnification. We’ll explain what those numbers mean and how magnification affects your shooting at different distances, helping you choose the perfect scope. By the end, you’ll be a magnification master, ready to make those long-range hits with confidence.
Understanding Scope Magnification Basics
Magnification is the capacity of the scope to make an object looked at appear to be larger than what it is.
Let us suppose the target is at 100 yards out. The target would appear three times larger and closer just by the enlargement made by the 3x magnification scope, meaning the target would seem to be just 33 yards away.
This makes it easier to aim and recognize details on the target among the other objects in that environment.
What Does Scope Numbers Mean?
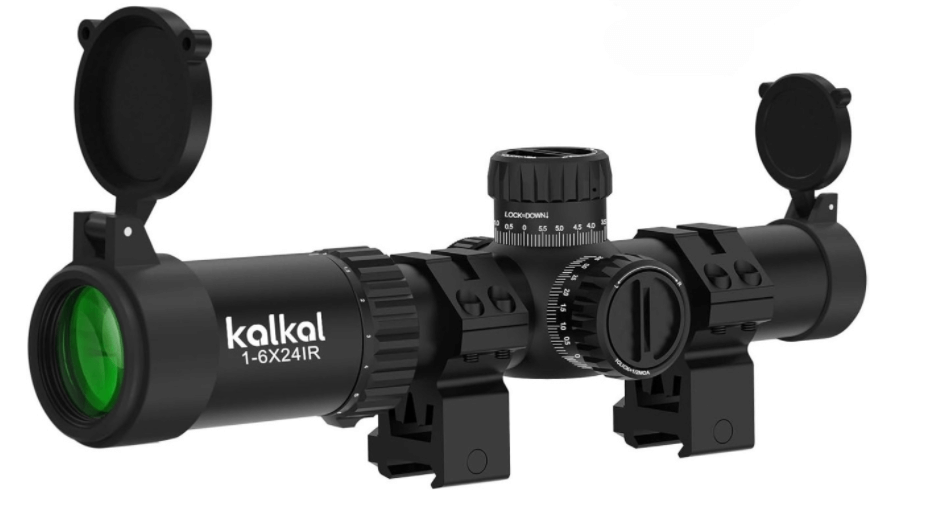
The numbers labeled on the scope, such as “3-9x” or “1-6×24” are the variable power zoom of the scope. The first number before the ”x” represents the minimum level of magnification. This makes it suitable to shoot in concentrated regions or dense vegetation; it is useful when the angle of sight has to be broader to locate your target rapidly.
On the other hand, the second number after the ”x” refers to the objective lens diameter measured in millimeters. This helps one to magnify an object far away thus providing the viewer with a closer detailed picture for accurate shot placement.
As with any optical instrument, the greater the degree of magnification, the lesser the swath or the area that is captured by the lens.
How To Read Scope Numbers?
Examples:
3-9x: This means the scope magnification can be adjusted from 3 to 9 times. Depending on the setting, the image you see through the scope will appear 3 to 9 times closer than it would with your naked eye.
1-6×24: This means the scope magnification can be adjusted from 1 to 6 times. And then ’24’ implies the objective lens (the lens at the far end of the scope) is 24mm wide.
Scope Magnification For Different Distances
Choosing the right magnification for your shooting distance is crucial for optimal performance. Here’s a breakdown of recommended magnification ranges for various distances:
1. Scope magnification for 100 yards
- Explanation: Prioritize a wider field of view for quick target acquisition in close quarters, like brush or tight spaces.
- Recommended Magnification Range: Low (1x – 4x)
2. Scope magnification for 300 yards
- Explanation: Balance between field of view and target detail for accurate aiming at most common shooting distances.
- Recommended Magnification Range: Versatile (4x – 8x)
3. Scope magnification for 500 yards
- Explanation: Strike a balance between zooming in for precise shot placement and maintaining some field of view for situational awareness.
- Recommended Magnification Range: Mid-range (8x – 16x)
4. Scope magnification for 1000 yards
- Explanation: Maximize target detail and ensure accuracy for long-range shooting. High magnification scopes allow you to see minute details on distant targets.
- Recommended Magnification Range: High (16x+)
How To Choose The Right Scope Magnification?
However, the above chart indicates the general understanding of how we would choose, and therefore, selecting the right magnification means considering more than distance. Here’s how to fine-tune your selection:
Consider Your Shooting Style
Does your configuration favor rapid target engagement within short ranges? An independent low-power variable objective (LPO) with 1X-4X zoom allows a wide field of view for rapid movement.
If you consider yourself an eventual traveler, then keep on reading for the tips that will help you connect with like-minded people and advance in your quest. A high-power scope (16x+) will have the highest magnification possible to enable the shooter to aim accurately at long ranges.
If you need versatility for different shooting conditions? A mid-power prism (4x-16x) gives a decent magnification range while keeping the FOV acceptable for most situations.
Think About Your Environment
When planning the shooting session, did you know whether it would be in areas with dense undergrowth or wide empty plains? As targets become obscured in dense surroundings, low magnification or wide-angle lens across locations is preferable in identifying targets.
Are you interested in low-light-level visual acquisition? Hunting scopes that have relatively large front lenses get more light in and are thus better for use at dawn, dusk, or when hunting behind trees/ rocks. It is a generalization that scopes of greater magnification have smaller objectives affecting low-light capabilities.
Scope Magnification Distance Chart (General Recommendations)
| Shooting Activity | Typical Distance | Recommended Magnification Range |
| Close-quarters defense/brush hunting | Up to 100 yards | Low (1x – 4x) |
| Varmint hunting/target shooting | Up to 300 yards | Versatile (4x – 8x) |
| Deer hunting (open fields) | Up to 300 yards | Versatile (4x – 8x) |
| Deer hunting (wooded areas) | Up to 200 yards | Low-mid (3x – 9x) |
| Long-range target shooting/hunting | 300+ yards | Mid-range to High (8x – 16x+) |
Factors That Affect Magnification Requirements
In the previous section, we have learned about the meaning of magnification and studied general advice concerning distance. However, selecting the suitable scope magnification does not always fit all the existing options.
Here are other factors that may play a role:
1. Shooter’s Vision
If a shooter has excellent peripheral vision, he/she may prefer a greater base mag for closer-range purposes. On the other hand, individuals with slightly impaired vision may find that a lower level of magnification would help them bring the target into sight faster no matter how far the target is placed.
2. Shooting Position
Shooting positions that enforce stability, including benches or even when the shooter is prone, enables higher magnification levels due to limited movement. Offhand shooting on the other hand needs a broader field of view which means less magnification but decent stability.
3. Reticle Choice
The aiming point inside the scope (the reticle) has an interaction with the magnification settings. Thick reticles are better visible at low magnification, whereas thin lines are more appropriate when aiming at long ranges with high power.
4. Lighting Conditions
As stated above, low light conditions are often well served by larger objective lenses as these are typically furnished with lower magnification ratios. You may select a scope with greater magnification capacity and larger objective lens diameter even if shooting at shorter ranges solely to counter poor low light capabilities.
5. Personal Preference
Lastly, the two factors namely; comfort and the style of shooting largely determine the results achieved. Practical range session to explore various levels of magnification and to select the most comfortable as well as reliable one.
How To Sight In a Rifle Scope?
Now that you’ve considered all the factors affecting magnification and chosen the perfect scope for your shooting application, it’s time to ensure peak accuracy by sighting in your scope.
Sighting essentially tailors the scope’s reticle (the aiming point) to precisely match where your bullet hits the target at a chosen distance, typically 100 yards for most rifles.
This customization process is crucial because even the most meticulously crafted scope isn’t a guarantee of perfect bullet placement out of the box. Think of it as fine-tuning the scope to align with your specific rifle and ammunition combination perfectly
Why Do You Need to Sight in a Scoped Rifle?
Although Rifle Scopes may be accurate devices, they are not mutually infused with the ability to calibrate to each rifle and specific ammunition type.
It is very important to understand that even a rifle can have minor differences in its shooting characteristics (inherent barrel defects) and ammunition with the corresponding weight, construction, and powder load of a bullet.
This is because sighting in your scope directly aligns the reticle to the expected point of bullet impact at a given distance manually.
It also means that the bullet impact on the target such as via crosshairs or any other design used will impact as desired, irrespective of the mechanical or ammunition difference.
Scope Sight-In And Magnifications
While shooting accuracy, magnification plays a role in stability and visibility, but it does not impact sightings directly. The basic process of practicing to sight a scope does not depend on the amount of magnification that has been used.
Nonetheless, the increased magnification reveals definite benefits in making the procedure significantly less complicated and more accurate.
At much lower power, the size of the impressions created by the bullet on the target may be slightly blurred or possibly obscured. This means that one can easily be misled about where he is directing the holes and exactly where the impact is likely to be felt.
While a low magnification makes it easier to cover a wider area and take aim, a high magnification gives a better view when identifying bullet holes. One can easily distinguish the shapes of individual holes and measure their distance from the aiming point with a great degree of accuracy. This translates to better and quicker changes to your scope’s reticle during the sighting-in stage.
Steps To Sight In a Rifle Scope
Sighting in scope requires a steady rest, a clean rifle, proper ammunition, and a safe shooting range. Here’s a general outline of the process (consult your scope’s manual for specific instructions):
- Secure your rifle in a stable rest. This minimizes shooter error and allows for precise adjustments.
- Aim at a target at your desired sighting-in distance. Most rifles are sighted at 100 yards.
- Fire a three-shot group. This helps identify any random variations in bullet impact.
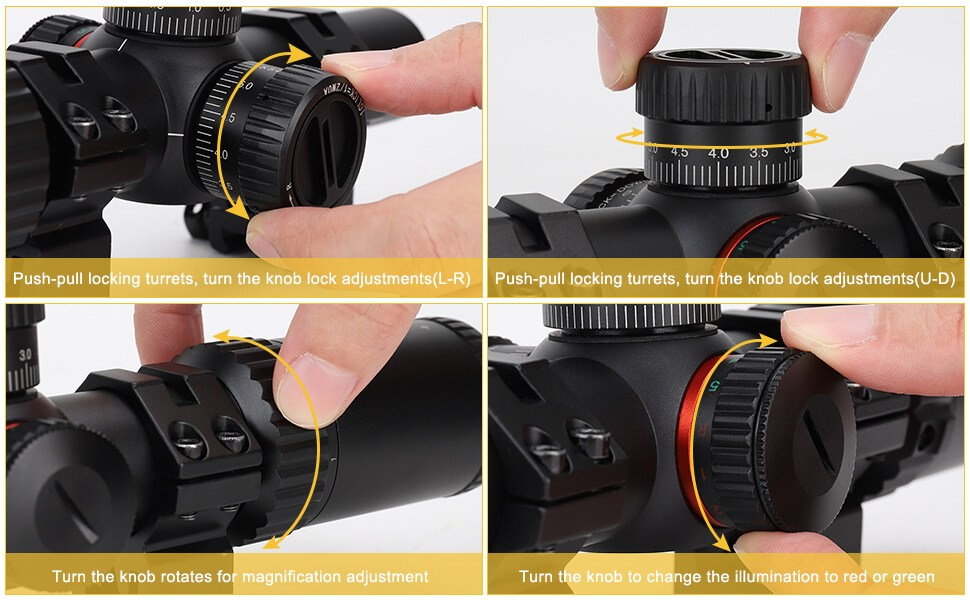
- Adjust your scope’s reticle based on the point of impact. Most scopes have dials or knobs for windage (horizontal) and elevation (vertical) adjustments.
- Repeat steps 2-4 until your bullet holes consistently hit your aiming point.
Tips For Effective Shooting Performance
Now you’ve selected the best scope magnification and tuned it for the highest performance, it is now high time we also looked at some other useful tips to enhance your shooting abilities.
1. Understanding Magnification and Accuracy
Thus, increasing the scope’s magnification means that the target picture is clearer but doesn’t necessarily produce better accuracy. Here’s why:
- Shake and wobble: A high magnification also enlarges even the smallest particles; minute movements are easily visible. If the firearms are not set in a rigid setup other than a benchrest, a high magnification can make it difficult to keep the reticle static on target causing inaccuracy.
- Focus: Targeting can be easily lost at high magnification and even when focused on an object it may be slippery to keep the focus on it for some time. There’s eye strain or Eye Fatigue and this leads to the inability to focus correctly and the reticle or target begins to blur.
2. Optimizing Shooting Performance
Master the fundamentals: Each matter of time, irrespective of the level of magnification used, depends on shooting positions, breath control, controlling the trigger, and the sight picture.
- Practice with your chosen magnification: Familiarize yourself with the specific sight picture and reticle at the chosen magnification level. The more you are familiar with a firearm, the more your shots will be accurate and confident.
- Find the right balance: To balance the amount of detail on the target and the amount of shake at the range, try out different magnification settings by experimenting with the eyepiece.
- Don’t be afraid to go lower: Although increasing the magnification is desirable for distant shooting, it is crucial to have a magnification that will not blur the sight picture for good shots.
3. Additional Tips
- Use a quality scope: A good scope with clear optics will enhance your sight picture and thereby improve your shooting experience.
- Consider a good shooting rest: A stable rest for extended shooting positions reduces error and also provides the shooter with a better position to aim at the target.
- Take breaks: One of the major drawbacks to increasing the magnification is eye strain. To reduce strain on your eyes, be sure to take short intervals of time to allow your eyes to rest and refocus.
Wrapping Up
Opting for the right amount of scope magnification can remove the element of guesswork from aiming and make your shooting a lot more enjoyable. This knowledge will help you unlock the magnification ranges, what they imply in terms of precision at varying distances, and other issues such as style of shooting and surroundings.
We have also revealed how to sight in and the role that is played by the magnification level or power. With these tips and regular practice with your selected scope, you shall be able to hit your targets with much ease and more importantly, hit targets at long ranges with much ease as well.
Bear in mind, that the concepts of stability and magnification are rock-bottom to fishing; therefore, in practice, it is sometimes good to go back to basics. Now you are ready to rule the range!









Leave a reply